 |
| Before and After |
 |
| Before |
 |
| Before |
 |
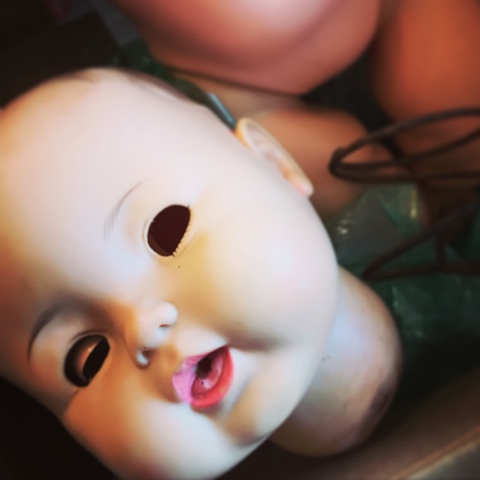
| I've never seen a head hook like this before. |
Lately I've been stepping up my social media marketing and as a result I've seen a huge influx of doll hospital patients. New dolls have been showing up on my doorstep almost daily. I am thrilled with this increase in business, although my hands are in traction after several difficult boil method eye replacements.I am getting arthritis in my hands to the point it's affecting my ability to work as much as I would like (which is basically around the clock, as you know). I am kicking the idea of a doll school around. The idea is you would sign up for a monthly subscription and would receive a lesson with a kit of materials to make each repair. By the end of all the classes you will have learned all you need to repair your own precious dolls and even enough to start your own doll hospital. I'm having trouble with the amount of coding required to set up recurring payments. There is software you can purchase but my husband doesn't think anyone will want to sign up for a subscription like this so I am scared to purchase the billing system. If you would like to sign up for lessons please let me know so I can determine if it's a viable idea.
Anyway, with all these dolls showing up I have encountered some I've never seen before and how some of them are constructed is just crazy! This particular baby is the Playtex Dryper Baby doll made in 1959 by Ideal. She's a rare doll and I haven't ever worked on one. Her "mom" purchased doll kits for restringing and eye replacement from my Etsy shop but found it difficult and wasn't happy with the result so she sent her to me for repairs. I could see immediately why she had trouble; this doll has a narrow neck, so you would normally use the boil method to insert new eyes. However, the doll is extremely thick vinyl that makes it really hard to squeeze the eyes out and get new ones in. Then the doll has strung arms but otherwise she's not a strung doll. She has a crazy giant head screw I've never seen before. It's kind of like the screws used in porcelain doll making but not exactly. Ideal was all about insane head attachments, as I learned in the restoration of their
Shirley Temple doll from the same era. I searched and searched for repair tips but couldn't find any, thus, a new tutorial.
 |
| Heat the vinyl to remove the metal plate. |
I regret to say I forgot to take a photo of the metal plate in this doll's neck just by itself. The doll has a round metal plate with two circular holes in it stuck in the neck opening. The head screw/spring thing attaches to the plate through the holes and they also originally let the drink and wet tube pass through the plate into the body (WHYYYY, THOUGH did all these doll companies make drink and wet dolls with metal parts??? They are always all rusty and horrible inside!). Anyway, to remove the plate in the neck so you can get to the eyes you will need to heat the vinyl. I used a hair dryer. You can take the plate out completely or just push it up into the head and work around it, which is what I did because I didn't feel like having to mess with getting it back into the neck later.
 |
| Use a rod to position the eyes. |
 |
| Heat the vinyl to push the eyes further into the sockets. |
The secret of my cut and glue eye replacement method is you can use larger sized eyes than you can with the boil method. The owner had already cut the eye pockets open so I used the cut and glue method to replace the eyes. This doll takes a 17mm eye but if you tried to push them in from the front you'd never get the casing into the pocket and you'd have to go down to a 15 or maybe even a 14 and it wouldn't look as good. Even with the cut method the 17mm eyes are hard to push into the sockets, which are exactly the same size, so I used a hair dryer to heat the vinyl so I could push the eyes further forward into the sockets. Before pushing them all the way in I used a bamboo skewer to position them.
 |
| The finished eyes. |
A good thing to keep on hand in your doll studio are the bamboo chopsticks you get from Chinese restaurants. I wash these and save them. The are wonderful tools for getting into tight spots and since they are disposable you can throw them out if they get too messy. I usually just clean mine over and over, though. I used the chopstick for pushing the eyes are far as possible into the sockets and for gluing them.
 |
| Use a chopstick for the glue. |
 |
| Insert the glue. |
In this case the wide top end of the chopstick was perfect for applying the glue on the backs of the eyes. The narrow, long neck opening would have made it really hard using anything else. You want to be precise with the glue so you don't get it all over the head or the eyes and the chopstick is great for that.
 |
| The glued eyes and the metal plate. |
 |
| Lay the doll on her side to dry. |
When the eyes were glued I had to lay the doll on her side to dry them because the head wouldn't stand up well on its narrow neck. You don't want to face the doll downward because the glue can run into the eyes and ruin them, which is something I learned the hard way!
 |
| The spring attaches to the plate as shown. |
When the doll's eyes were dry I reattached the head. To do this you push the spring over the doll's neck and push the hook up from the bottom to hook it to the plate as shown. This is difficult, especially if the spring is seized up. Use caution so the spring doesn't fly out of your grasp and take your own eye out! If you can, get a strong man to help you. I was strong enough, but just barely, and as I said, now I have my hands all wrapped up in supports.
 |
| This is how the spring should look. |
 |
| The spring holds the head inside the body. |
 |
| Push the head into the body. |
The screw/spring will hold the head inside the body. To insert it you have to push and also kind of screw the neck into the body opening. The body is harder plastic than the head but heating it might help some if you're having trouble. I found by turning the head like I was turning a screw I was able to insert it without heating it. You will have to push really hard.
 |
| Bring the elastic behind the spring. |
 |
| The drink and wet tube opening is in the background. |
Once you have the head attached you can string the arms. I brought the cord behind the spring so it wouldn't get all tangled up and mess up the arm and head movement. In the background you can see the drink and wet tube exit. If you wanted to preserve the drink and wet function you would have to run a tube from the attachment on the mouth through the metal neck plate into the body and attach it to the ferrule in the back (this doll wets very unrealistically from her upper back!). My customer didn't want the drink and wet function and I was happy to not have to mess with finding and inserting tubing so we left it out.
 |
| Knot the cord. |
As always, pull the cord as tight as possible, which is easiest if you use a hemostat such as those available in my Etsy shop and knot the cord. Check the movement before you cut the cord to make sure you got it tight enough.
At this point, if I were doing a full restoration I would refresh the doll's face and hair paint. My customer is an accomplished crafter in this case, so she's going to take care of that. I actually do quite a bit of work for other restorers who just aren't good at eyes. We each have our strengths and it's fun to collaborate with others in my profession, so I enjoy that.
Please make sure to message me and let me know if you'd be interested in a Mandaline University subscription. You can do that and also buy supplies and already-restored dolls from
ateliermandaline.com.
 |
| The finished doll |


Comments
Post a Comment