How to Replace a Cloth Doll Body
Here is another tutorial showing my least favorite repair: doll body replacement. I keep making tutorials in the hopes everyone will learn to do this themselves! I'm currently charging $100 for this but it will probably go up because people keep sending me dolls. This is just too labor-intensive; I don't make anywhere near my regular salary doing this repair and it hurts my hands.
Besides that, there is a super-easy way to do this yourself. You can get on eBay or go to a thrift store and get a doll of the same size with a good body and just move your head to the better body. That way it's still "your" doll. When you get on eBay you will probably find you can buy a brand new version of your doll for way less than sending it to me. From what I can see, 95% of kids had the same baby doll during their childhood and they are plentiful. The doll in this video was owned by all the 80s and 90s kids (originally a Zapf Creation head mold). The late 50s-70s kids had the Madame Alexander Kathy Baby face mold doll. They were manufactured by different suppliers using the same molds and sold everywhere from gas stations to grocery stores to department stores and toy shops so the quality varies but they are pretty ubiquitous still. I know a lot of people don't want a new doll because they see their doll as a real person but moving the head solves that issue.
However, if you still want to use the original head and limbs here is how to make a new body. You can watch the fast version in the video or follow these steps.


First, cut the zip tie or untie the drawstring attaching the head. Remove the head and set aside. Remove the stuffing from the body. If the stuffing isn't dirty you can save it to re-use. This stuffing wasn't dirty and it's unusually heavy and unlike what I can buy today so I saved it. Plus the owner said something about wanting the body to be the same and not "fat" and I wasn't sure what that meant so I elected to just use the original stuffing. I save the stuffing in a grocery bag until I'm ready to use it again.
When you've removed the stuffing you will need to carefully remove the limbs. Use a seam ripper to cut each stitch until it detaches from the body. You might want to take photos of each stage as you work so you will remember how to put the new body together. Set aside the limbs and then carefully pick apart the body pieces. You are going to use the body pieces as a pattern to make a new body so it's important to keep the pieces as intact as possible. Use a seam ripper to take apart the pieces. You can get a seam ripper from fabric stores or sewing sections of stores like Walmart. Carefully pick each stitch to break it until the pieces are free from each other. Set the body pieces aside somewhere they won't get lost because you will need them.
Once the body pieces and limbs are separate you will need to get every bit of thread out of the holes in the limbs so you can sew them to the new body. I use a seam ripper and sometimes even have to pull out bits of thread with pliers. The limb is done when it's completely free of thread. It's easiest to go ahead and scrub the head and limbs to clean them when they're all separate from the body. You can let them dry while you're making the new body.
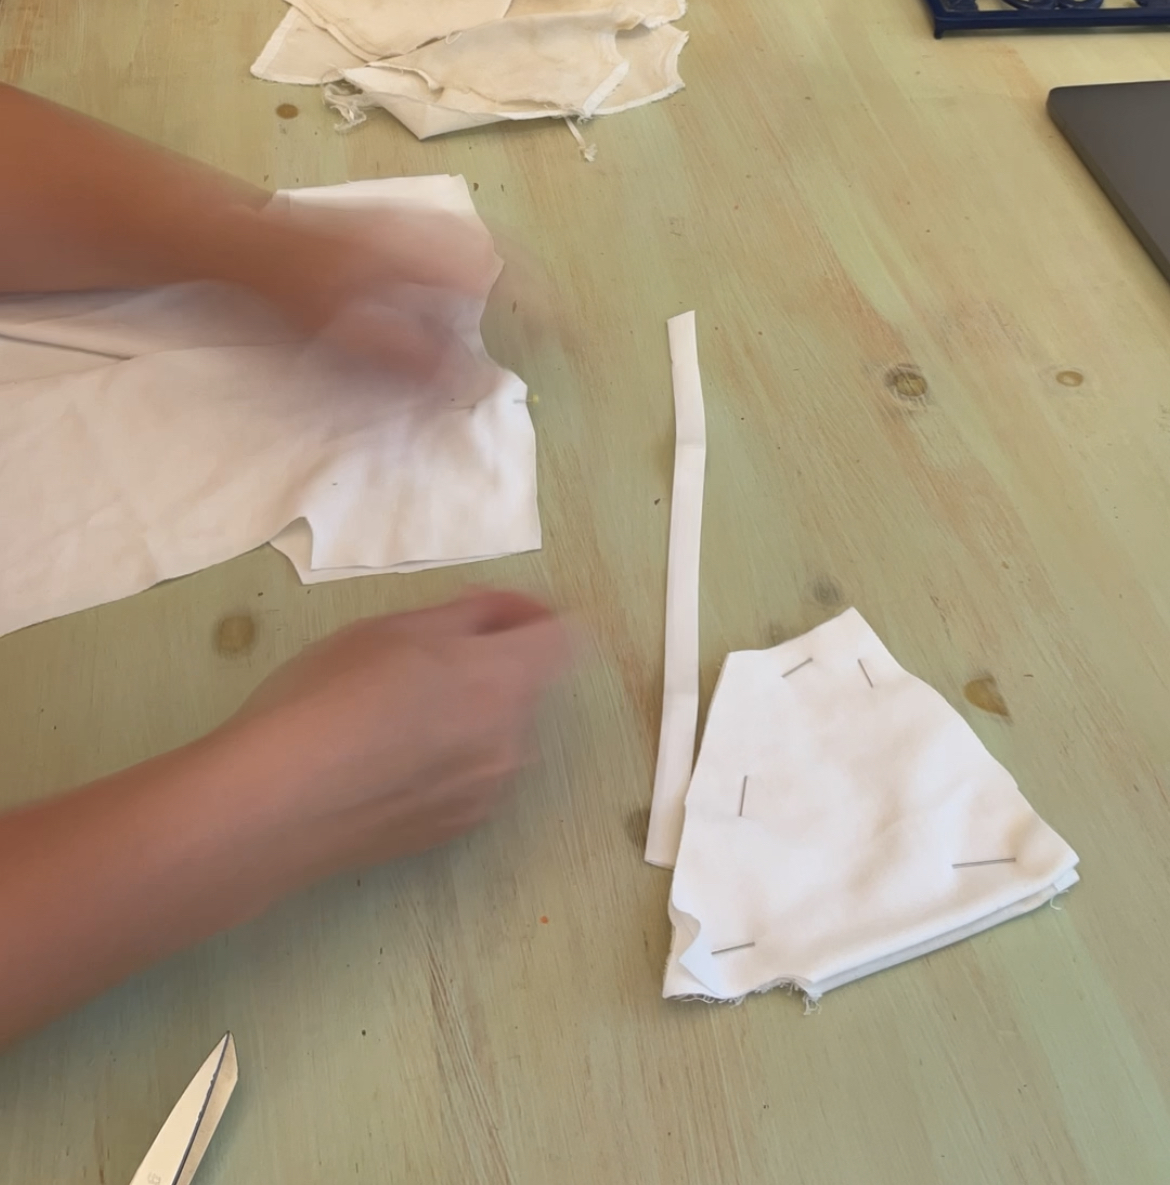
Examine the body pieces and figure out which ones are the most intact. People often wait so long to replace the body big sections will be missing or patched. In this case one arm was mostly gone so I had to trace the arm from a different piece to recreate it. Iron the original body pieces to get them flat. Make sure to measure the seam allowance used in the original body. That is the length between the cut edge of the fabric and the row of stitches. In this case it was 1/4". If you have to recreate part of the body make sure to add in the seam allowance. Lay out your new body fabric and pin the old body pieces to it to make a pattern. Cut the fabric. Whenever I can find it I like to use very thick stretch knit for the body. It's more durable for play and the stretch is forgiving if I have to make a new body part and it's not exactly the same as the original. For the neck casing I use wide double fold bias tape, even if the rest of the body is knit. I cut the bias tape an inch or two longer than the original so I can overlap it to cover the zip tie.


Pin the new body pieces with right sides together and make sure you understand how it all fits. Sew the body pieces together. When it is all sewn together add the bias tape for the neck casing. Make sure not to stretch the body fabric if it's knit when you sew on the bias tape.


When the body is finished you can sew on the limbs. I started with an arm which was a mistake; start with the legs, as it's easier to sew them on without the arms in the way. Remember you are sewing the right side (outside) of the body facing the limb so the stitches are on the inside. Pin the limb in place before you sew it to make sure it's in the right spot. It's easy to accidentally put them on backwards. Use heavy duty thread like hand-quilting thread and a thimble to sew through the existing holes in the limb. I sew two or three layers of stitches to make sure the limbs are firmly attached.


Comments
Post a Comment