Upcycles & Updates
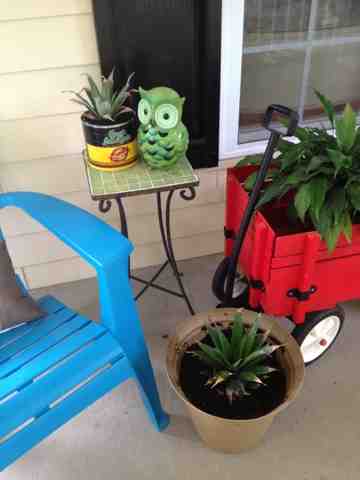 |
| Pineapple plants on the porch |
I was rather dismayed to see the high the prices on planters of any size when I was shopping for pots for these. I do have some new and old food tins, though, and I thought they would make cute planters. I started with the Chock Full of Nuts coffee tin we just emptied. I love Chock Full of Nuts coffee and I also love their retro, art-deco style graphics. I liked the previous can design better than this one, but this is still cool and it really does look old. I also like the plastic lid, which can be used as a base to keep the planter from leaving rust marks.
 |
| Plastic lids can be affixed to the bottom of the tin to catch drainage water and prevent rust marks. |
 |
| Punch drainage holes in the bottom of the tin. |
 |
| Space several holes evenly across the base. |
After you punch the drainage holes, all you need to do is affix the plastic lid, if the tin has one, to the base to prevent rust marks, fill the tin with potting soil, plant, and water! This is such a great way to recycle and save money on planters.
I realized as I was reading over my past couple entries, I never showed the preparation of the pineapple before you root it. Sorry about that! If your pineapple is really ripe, you can just grasp the fruit firmly and twist the top off by grabbing the leaves and twisting them around. If that doesn't work then just cut the leaves out.
 |
| If the pineapple is really ripe you can twist the leaves off. |
Remove the lower leaves by just pulling them off, or cutting them off if they're stubborn. You want to just remove the leaves that would be under water when you put the pineapple in a jar so they don't rot. Sometimes as you remove the leaves you will find the pineapple is already rooting. In that case, just leave the roots on and immerse them in water to wake them from dormancy.
 |
| Remove the lower leaves; sometimes you will find roots already growing. |
Place your pineapple top in a jar of water. If you only have wide-mouth jars you can poke toothpicks into the bottom to keep the leaves up out of the water. The base must be immersed, however.

After a week or two the pineapple should be well-rooted. Once the roots are full and long, the pineapple is ready to plant.
 |
| The plant is well-rooted. |
You will see the ends of the leaves turning brown, but don't worry about that. If you look in the center of the plant you will see new leaves growing. Eventually those will become quite large and you can cut off the old brown leaves.
 |
| New leaves grow from the center of the plant. |
The plant will set fruit on its sides. You will need to move the plants indoors in the winter, since they are tropical plants. I haven't had a pineapple set fruit yet, but my citrus trees took about two years to begin fruiting. They are also kept outside in summer and brought inside in winter. Keep this in mind when you choose your planter; try to find a lightweight option so you don't break your back moving the plants in and out! You can find more on growing kitchen scraps in my Taking Root post: http://mandalineartfulliving.blogspot.com/2013/05/taking-root.html and on my Pinterest Gardening board.
I have some other updates to my last couple posts as well. Yesterday was field day at my daughter's school, so I applied my homemade waterproof sunscreen to her before she left. She has very dark skin, so it looks a little weird on her since it leaves a pale film. However, I put the sunscreen on her at 6:30 AM and after swim practice at 8:45 PM water was still beading up on her skin and her sunscreen had not worn off! We did not apply the sunscreen more than once! You can find my sunscreen recipes in my Summer Sun-Days post: http://mandalineartfulliving.blogspot.com/2013/06/summer-sun-days-or-how-to-make-homemade.html. The one I mention here is the Waterproof recipe, using 1 1/2 TBSP of beeswax.
Jerry and I are on the third day of our whey protein, vegetable, fruit, and nut diet. I am starving and rather out of it, but so far I've lost 2 pounds. We are going to a reunion at a water park at the end of the month with some friends we haven't seen for 6 years, so I hope I can stay on the diet long enough to really look good in my swimsuit!
I have several sewing projects in the pipeline, because I just got a fabulous new professional machine. I will write more about that once I've completed the first one. I have so many projects in the works in various areas it makes my head spin! It's better for me to be busy, though, or I tend to get bored.
As far as the garden is going, today I found a box turtle in the road and relocated him to the garden. Although he won't help with the moles he should be a great defense against slugs and insects. Today our first sugar snap peas, Melting Sugar, were ready and I ate them for lunch. They were delicious! Sugar peas raw off the vine are a favorite food of mine. It looks like we will have snow peas and tomatoes ready very soon. The potato plants are huge, but the leaves haven't died back yet, so they're not ready to harvest. I may sneak some baby potatoes out when more peas are ready though, because I absolutely love new potatoes and baby peas as well. I'm glad to be a gardener; it brings so much joy to know you can craft your own world, as beautiful and delectable as you prefer.


Comments
Post a Comment