 |
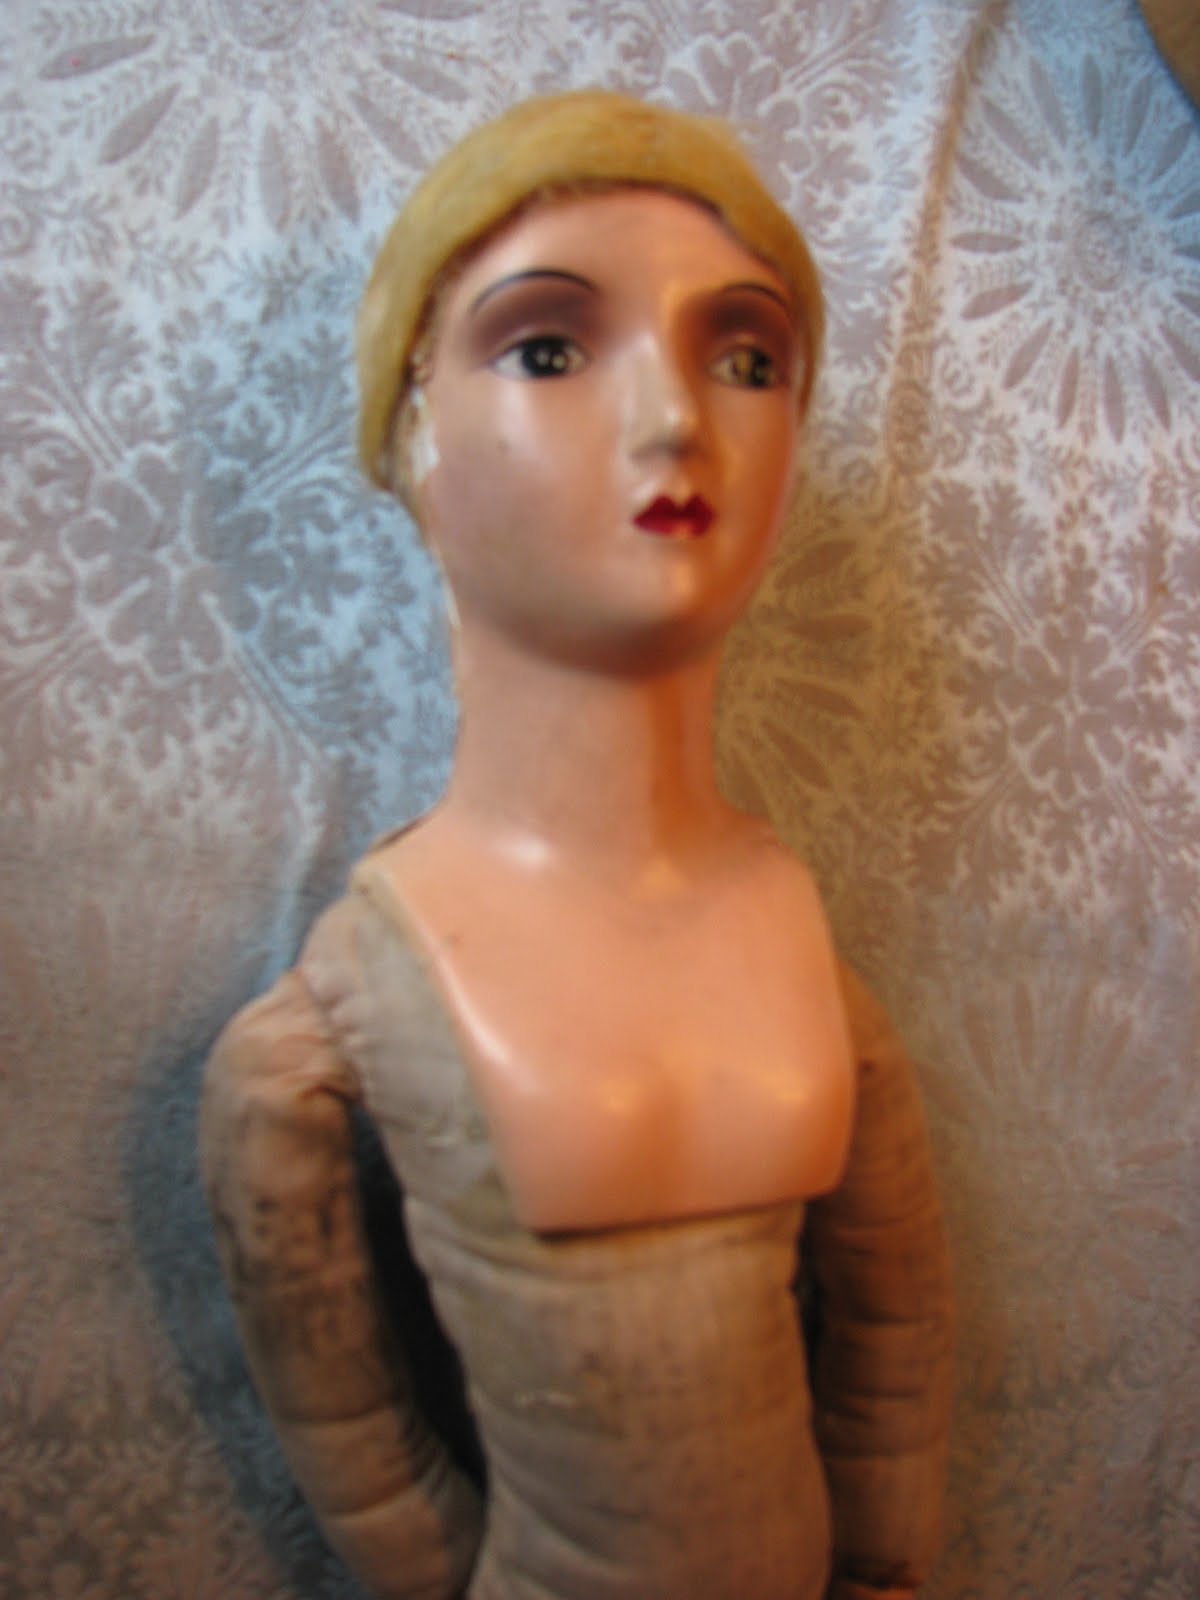
| This is an early 1920s boudoir doll, still in original clothing. |
 |
| She was a "fashion victim" in the 1970s when someone glued this horrible faux fur helmet to her head and neck! |
One day on our Michigan vacation I wandered into a typical Northport resale shop, which has a sign on the door saying they are open "mostly by chance" looking for vintage juice glasses. Instead, I found this antique doll sitting, dirty and neglected, on a high shelf. I could see her well enough to tell she was a boudoir, probably from the 20s or 30s. I got her down and saw her tag said she was from the early 1920s. I could also see, on close inspection, that she was the victim of a very unskilled and unfortunate restoration. Judging from the materials used, this occurred sometime in the 1960s or 70s.
The main lesson from this poor girl is, if you don't know what you're doing and aren't going to do any research, then STEP AWAY from the doll! The would-be doll restorer fashioned a sort of helmet from faux fur and glued it to the doll's head and the sides of her neck. The doll had a lot of crazing and cracking in the composition material in that area and they may have been trying to cover it. In any case, that only made it worse. The doll was also allowed to get extremely dirty. To start, I removed her fur "hair", which was disgusting and full of bugs and insect casings, and thoroughly cleaned her.
 |
| The boudoir doll with her fur hair and clothing removed. |
 |
| The doll is carefully cleaned. |
To clean the doll I first used Q-tips and a water and dish soap liquid mixture. She had some stubborn glue stains and ingrained dirt all over, so I went back over her with a Mr Clean Magic Eraser. Be VERY cautious with the Mr Clean erasers, as they will remove the paint. While the doll's clothes were off I hand-washed them and let them air-dry. Spot-check the fabric in an inconspicuous spot before cleaning to make sure it is safe to use water on the cloth. Let the doll dry thoroughly before beginning the composition repair.
 |
| The doll had a lot of composition degradation, probably from water damage and the glue used to attach the fur on her head and neck. |
 |
I used sculptured acrylic nail material to fill in the broken areas of the composition.
|
The doll had quite a bit of damage to her composition. Much of this was from the glue used in the first restoration, so it is a real shame the person didn't know what they were doing! It looks like she got wet or damp at some point and her shoulder swelled and cracked. Her body also has a lot of mildew staining. A good book for general doll repair is All About Doll Repair & Care by Carol Lindberg. It is available on eBay. Mrs. Lindberg advises using auto body putty to repair the composition, but you can also use acrylic nail material. This time I used the nail material. This repair will be apparent, so you want to confine it to areas you can cover with clothing or a wig if possible. The acrylic will stabilize the chipping composition, preventing further decay. Use the instructions in the package to make the acrylic. It really smells, so work in an open, ventilated area. Generally, you just dip a brush into a jar of acrylic liquid and dip it into the acrylic powder. Then use the resulting putty-type acrylic to fill in the holes. You can even sculpt new fingers if they are missing. When the acrylic is dry sand it lightly, being careful not to sand the original areas, and paint with a matching paint color. I use acrylic paint. The nail mixture is translucent, so you may need more than one coat of paint.
 |
| The composition repaired, I added a new wig. |
 |
Mohair and glue were used to make the wig.
|
Once the paint is dry you can rewig the doll if necessary. If there was anything good about this doll's original restoration it is that the fur hat protected the original hair underneath, so I could see the color and style. These dolls generally had big hats, so they didn't have much hair. It looks like this doll originally had golden blond mohair styled in waves very close to the back of her head and a bit longer in front. Because of the glue on her forehead and the damaged neck I could not use the original hair, but made a new wig. I chose wavy mohair in the closest shade to the original. To make this type of wig take a package of mohair and sew down the middle using the finest stitch setting on your machine. Use matching thread. This will be the part in the hair. Glue on to the head using Aleene's Tacky glue or other white water-soluble glue (so a future restorer can remove it without damage if necessary). I glued the wig over the original hair to enhance the fullness, as I did not have much mohair in this shade. Style the mohair in waves by pulling across with a t-pin or metal comb and spraying with hairspray to set the wave.
 |
| The cleaned and repaired doll with her new wig. |
The doll is finished to this point. Now I have to work on her costume. Her original clothing was sewn to her body. That is very common with these dolls. However, her dress is disintegrating, so I am trying to figure out a way to resew it in a way that it can be taken on and off like a regular dress. Then I will sew a new costume for display so the original can be reserved. We are about to list our house for sale and I am getting ready to have a homestager come on Monday, so I'll have to get back to the doll later. For those of you who have never hired a homestager, you have to make your house look as though no one lives in it. A BIG challenge when you have 3 kids! So, as I can continue the doll restoration I'll write more entries.


oooo I can't wait to see her fully completed.
ReplyDeleteAll the best with the house. We just took our off the market last week. Had tons of viewings in 6 months but not a single offer, think the foreclosures had a lot to do with that, which I guess I don't blame people, that's what we would look to buy. :S